This post contains affiliate links. As an Amazon Associate, we earn from qualifying purchases.
To install a water filter over a countertop kitchen, first, ensure that you have enough space and clearance. Then, attach the filter’s bracket to the sink’s base or countertop using screws or adhesive, followed by connecting the filter to the faucet using the necessary adapters.
A countertop water filter is an excellent way to enhance the taste and quality of drinking water. It is also more cost-effective than purchasing bottled water, and it helps reduce your carbon footprint. Installing a water filter over your countertop kitchen is relatively simple and can be done without the need for a water treatment professional, making it an excellent diy project for homeowners.
In this article, we’ll guide you through the steps required to install a water filter over your countertop kitchen.
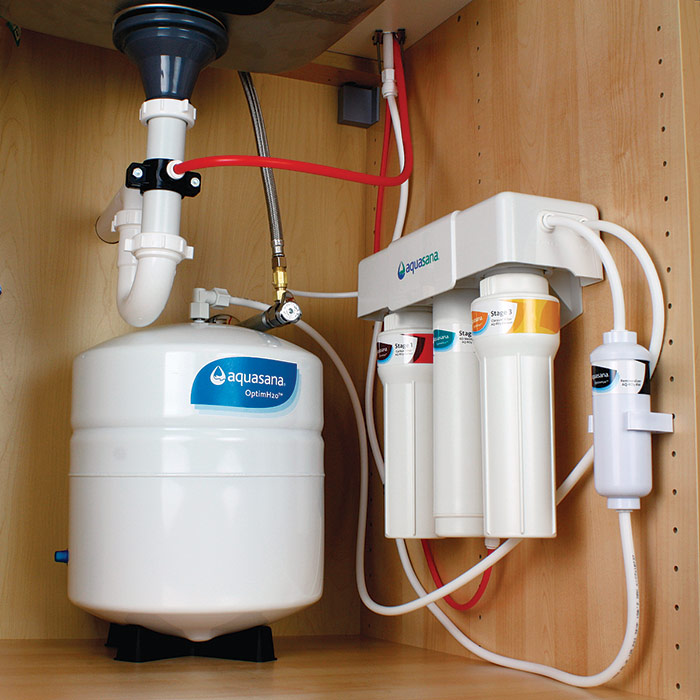
Credit: www.finehomebuilding.com
Preparing For Installation
Choosing The Right Over-Counter Water Filter For Your Kitchen
When choosing the right over-counter water filter for your kitchen, consider the following:
- Type of filter: Choose from activated carbon, reverse osmosis, or distillation filters based on your specific needs and budget.
- Capacity: Determine how much water your family consumes daily and select a filter that can handle your needs.
- Certification: Verify that the filter is certified to meet industry standards for removing contaminants.
Necessary Tools And Materials For Installation
Before installing your over-counter water filter, make sure you have the following tools and materials:
- Drill and drill bits
- Adjustable wrench
- Pipe cutter
- Teflon tape
- Screwdriver
- Water supply valve
- Water supply tubing
Measuring And Preparing The Installation Site
Preparing for installation is crucial to ensure that your over-counter water filter works effectively. Follow these steps:
- Measure the distance from your sink’s faucet to the underside of your cabinets to ensure there is enough clearance for the filter.
- Turn off the water supply valve and disconnect the cold-water supply line from your faucet.
- Drill a hole in your countertop or sink for the filter’s dispenser.
- Install the dispenser and filter bracket according to the manufacturer’s instructions.
- Connect the water supply tubing to the filter and the water supply valve.
- Turn on the water supply valve and check for any leaks.
By carefully selecting your over-counter water filter and preparing for installation correctly, you can enjoy clean and healthy water in your home.
Step-By-Step Installation Guide
Mounting The Water Filter Onto The Sink
Mounting the water filter onto the sink is a simple process that can be completed in a few easy steps:
- First, locate the spot where you want to install the filter. This spot should be easily accessible and close to the existing plumbing.
- Next, attach the mounting bracket to the spot where you want to install the filter using screws. Make sure the bracket is level and secure.
- Now, attach the filter to the bracket. Ensure that the filter is level and secure, and that it’s facing the right way based on your specific model’s instructions.
If you’re unsure about how to install the mounting bracket, refer to your specific model’s manual for detailed instructions.
Connecting The Filter To The Existing Plumbing
Connecting the filter to the existing plumbing is a straightforward process that involves a few simple steps:
- First, turn off the water supply to the sink where you’ll be installing the filter. You can usually do this by turning off the valve under the sink.
- Next, connect the incoming water line from your existing plumbing to the water filter’s input valve. Ensure that the connection is tight and secure.
- Now, connect the outgoing water line from the filter’s output valve to the faucet’s cold water side. Ensure that the connection is tight and secure.
- Once the connections are in place, turn on the water supply and check for any leaks.
Checking For Leaks And Proper Water Flow
After you’ve installed the filter and connected it to the existing plumbing, it’s essential to check for any leaks and ensure that the water flow is adequate:
- Check all connections for leaks, including where the filter attaches to the mounting bracket and where it connects to the incoming and outgoing water lines.
- Turn on the faucet and check to see if the water is flowing correctly. If the flow seems weak or uneven, check your installation steps and connections and correct any issues accordingly.
- If you do notice a leak, turn off the water supply and check the connections once again. Tighten any loose fittings and connections and try again.
Activating And Maintaining The Filter
Finally, once your filter is installed, you’ll need to activate and maintain it to ensure that it works correctly and stays in good condition:
- Before using the filter for the first time, you may need to activate it based on the specific model’s instructions.
- To maintain the filter, follow the manufacturer’s guidelines regarding filter replacement and maintenance. This will likely include regular filter replacement and cleaning to ensure that the filter works efficiently.
- Pay attention to the filter’s performance and make note of any changes in water quality or flow. If you notice any issues, refer to the manufacturer’s guidelines and adjust your maintenance routine accordingly.
Overall, installing a water filter onto your kitchen sink’s countertop is a simple diy process that can provide you with clean, fresh drinking water. Follow these step-by-step instructions to complete the installation and enjoy the benefits of filtered water in your home.
Frequently Asked Questions
How Often Should The Filter Be Replaced?
Over-counter water filters need to be regularly maintained and replaced for optimal performance. The answer to how often to replace the filter depends on the type of filter system and your usage. However, a general guideline is to replace the filter every 3-6 months.
Here are the key reasons why you should replace your filter regularly:
- Filters lose effectiveness over time and may become clogged with contaminants.
- Outdated filters may harbour bacteria and germs.
- Regular replacement ensures that your water is always clean and safe to drink.
What Types Of Contaminants Do Over-Counter Water Filters Remove?
Over-counter water filters can remove various contaminants, including sediment, chlorine, volatile organic compounds, lead, and bacteria. Here are some of the common types of contaminants that over-counter water filters can handle:
- Chlorine and its by-products that cause the water to have a bad taste and smell
- Sediment debris that affects the clarity and quality of the water
- Colloidal particles that clog up the filter
- Microbiological organisms that lead to sickness
- Volatile organic compounds that pose health risks
Can Over-Counter Filters Be Installed On Any Type Of Sink?
Yes, over-counter water filters can be installed on any type of sink. These filters are designed to be conveniently installed on top of your kitchen sink, usually near the faucet. Many types of over-counter filters do not require drilling or tapping, making them ideal for rental homes or apartments.
However, it is always recommended that you read the installation instructions provided by the manufacturer before installation.
Can The Installation Process Be Completed Without Professional Help?
Yes, over-counter water filters are designed to be installed without professional help. Many filter systems come with easy-to-read instructions and installation kits that include all the necessary components. The entire installation process typically takes less than thirty minutes and requires no special plumbing tools.
In addition, most over-counter filters come with a user-friendly installation guide and customer support to help you through any queries.
Frequently Asked Questions On How To Stalling Water Filter Over Counter Top Kitchen
How Do I Install An Over Counter Top Water Filter?
An over counter top water filter is easy to install. Apply teflon tape around the top of the faucet and connect the water filter to the faucet. You may need to add adapters to connect the tubing properly.
Do I Need Any Tools To Install An Over Counter Top Water Filter?
No, there is no need for tools when installing an over counter top water filter. The included connectors should be all you need, plus the teflon tape for the faucet threading if it is not included.
Can I Attach The Water Filter To My Existing Faucet?
Yes, most over counter top water filters come with connectors that fit onto a standard kitchen faucet. However, you may need to purchase an adapter if your faucet has an unusual threading.
How Often Should I Change The Filter?
It is recommended to change the water filter every 6 months or after approximately 1,000 gallons have been filtered. Some manufacturers may have different recommendations. Refer to your product manual for specific instructions.
Does An Over Counter Top Water Filter Remove All Contaminants?
No, an over counter top water filter can remove some contaminants, but not all. It is best to research which contaminants the filter removes and choose a filter that meets your needs.
Can I Use An Over Counter Top Water Filter For Hot Water?
No, over counter top water filters are designed for cold water only. Using them with hot water can damage the filter and reduce its effectiveness.
Conclusion
After reading through this detailed guide on stalling a water filter over the counter top in your kitchen, you now have a clear understanding of how to do it yourself. The process is simple and can save you money and time compared to having a plumber install it for you.
With the right tools and steps, you can enjoy clean and healthy drinking water in your own home. Remember to consult the manufacturer’s instructions before starting the installation and to turn off the water supply before making any changes. Don’t forget to regularly replace the filter to ensure the best results.
We hope this guide has been helpful and that you’ll enjoy your new water filter set up soon.