This post contains affiliate links. As an Amazon Associate, we earn from qualifying purchases.
To install the watts premier counter-top drinking water filter, first remove the aerator from the faucet and attach the diverter valve. Are you tired of drinking water straight from the tap?
Do you want a simple yet effective solution to get clean drinking water at home? Then the watts premier counter-top drinking water filter could be the answer. With this easy-to-install filter, you can enjoy fresh and clean drinking water in no time.
Whether you live in an apartment or a house, this countertop filter fits perfectly on most standard faucets. In this article, we will guide you through the installation process so you can start enjoying clean and tasty water.

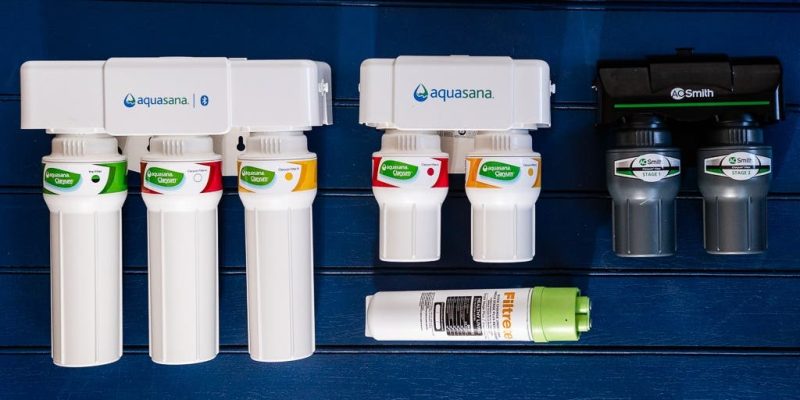
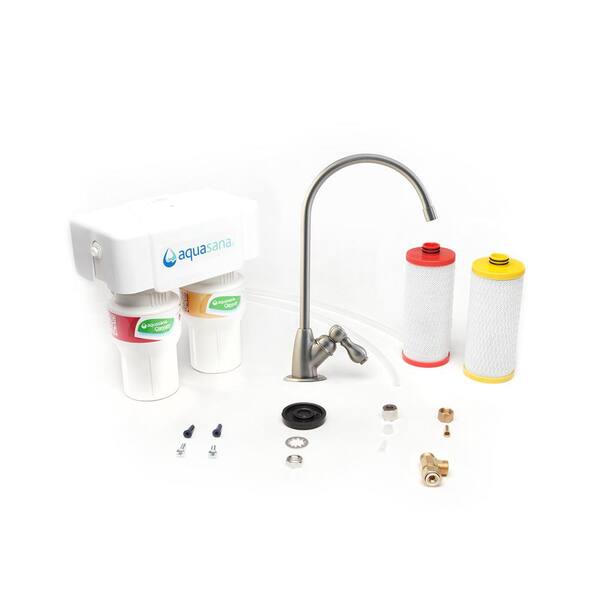
Credit: www.amazon.com
Why Choose Watts Premier Countertop Water Filter?
Installing a countertop water filter may seem daunting, but with the watts premier countertop drinking water filter, installation is a breeze. In this post, we will focus on the unique features and advantages of the watts premier countertop water filter, as well as make a comparison with other countertop water filters on the market.
Let’s dive in!
Unique Features And Advantages Of Watts Premier
- The watts premier countertop water filter is compact and portable, making it an ideal solution for smaller living spaces or traveling.
- It is designed with a long-lasting filter that can provide clean, safe drinking water for up to 6 months.
- The filter is made with a high-quality coconut shell carbon that reduces chlorine, unpleasant odors, and improves taste, ensuring that you have access to refreshing drinking water every day.
- The watts premier countertop water filter is an affordable alternative to expensive water filter systems that require installation.
- The filter housing and adaptor are made from durable, high-quality materials that make it long-lasting and easy to install.
Comparison With Other Countertop Water Filters On The Market
When compared to other countertop water filters on the market, the watts premier stands out for its unique features and advantages:
- The water filter is compact and easily portable. While some water filters may be smaller or lighter, they may not offer the same level of durability or long-lasting filter options.
- The high-quality coconut shell carbon filter in the watts premier is superior to other filters made from lower quality materials such as granular activated carbon (gac) or resin beads which can be less effective at removing impurities.
- The watts premier’s filter has been tested and certified by nsf international, ensuring that it meets strict public health and safety standards.
- The watts premier countertop water filter is a more affordable option to other countertop water filters which require installation or may have higher filter replacement costs.
The watts premier countertop drinking water filter provides an easy, portable, and affordable way to access clean drinking water at home or on-the-go. With its unique features and advantages, and superior coconut shell carbon filter, the watts premier stands out among other countertop water filters on the market.
Necessary Equipment And Pre-Installation Preparation
If you’re tired of buying expensive bottled water, or just want to make your tap water taste better, then installing a watts premier counter-top drinking water filter could be just what you need. But before you start, there are a few things you need to know to ensure a smooth installation process.
List Of Equipment Required For Installing The Filter
Before you begin installing your watts premier counter-top drinking water filter, it’s important to make sure you have all the necessary equipment. Here’s a list of what you’ll need:
- A phillips head screwdriver.
- A bowl or a bucket.
- A wrench or pliers.
- Teflon tape.
- The filter and its installation kit.
Tips For Proper Preparation Of The Countertop And Spout
Preparation is key to a successful installation process. Here are some tips to help you prepare your countertop and spout:
- Ensure that the countertop surface is clean and dry.
- Check that the spout you will be using for the installation is the correct size for your faucet.
- Before installation, turn off the water supply to your faucet.
- Remove any aerator or flow restrictor from your faucet’s spout. You may need pliers or a wrench to do this.
- Remove any debris or contaminants that may be in your faucet’s spout by running water through it for a few seconds.
Following these tips and having the necessary equipment will help make the installation process of your watts premier counter-top drinking water filter fast and easy. Remember to always read the instructions and consult with a professional if you are unsure about anything.
Enjoy your freshly filtered water!
Diy Guide: Install Watts Premier Countertop Water Filter In Minutes
Are you looking for a quick and easy way to enjoy clean, filtered water right from your countertop? With the watts premier countertop water filter, you can have filtered water on demand in minutes. Here’s a step-by-step guide to installing the filter yourself.
Step-By-Step Instructions For Installing The Filter
- Turn off the water supply to your sink.
- Remove the aerator from the end of your sink’s faucet.
- Attach the filter’s diverter valve to your faucet’s threading.
- Insert the tubing into the valve’s quick-connect fitting.
- Snap the filter into place on the mounting bracket.
- Connect the tubing to the filter’s inlet and outlet ports.
- Turn on the water supply and flush the filter for ten minutes.
- Enjoy your fresh and clean water!
Tips For Easy Installation
- Before starting, make sure you have all the necessary tools and parts. The installation kit should include everything you need.
- If you have trouble fitting the diverter valve onto your faucet, try using a rubber band or plumbers tape to create a tighter seal.
- When connecting the tubing to the filter, make sure the ends are fully inserted into the quick-connect fittings to prevent leaks.
- To prevent damage to your countertop or sink, place a towel or cushioning material under the mounting bracket before attaching the filter.
- If you have any questions or need assistance, consult the manufacturer’s instructions or contact their customer service.
With these easy-to-follow instructions and tips, you can quickly install your watts premier countertop water filter and enjoy fresh, clean water anytime.
Maintenance And Replacement Of Filter Cartridges
Watts premier counter-top drinking water filter is an excellent drink filtration system that offers clean drinking water for your family. A filtration system requires regular maintenance to achieve optimal performance. In this section, we’ll dive deeper into the maintenance and replacement of filter cartridges.
Frequency Of Replacing Filter Cartridges
The frequency of replacing filter cartridges depends on the usage of your filtration system. Typically, you should replace the filter cartridges every six to twelve months. However, suppose the quality of your water source is poor or you notice a decrease in water flow.
In that case, you should replace the filter cartridges sooner. Remember that the key to ensuring that your drinking water is clean and fresh is to replace the filter cartridges regularly.
Instructions For Replacing Filter Cartridges
Here are the steps for replacing the filter cartridges of your watts premier counter-top drinking water filter:
- Turn off the water supply to the filtration system by turning off the cold-water valve under the sink.
- Remove the filter housing by grasping the sump and turning it counterclockwise.
- Remove the old filter cartridge by pulling it downwards and dispose of the cartridge.
- Rinse the inside of the housing with warm water to remove any sediment or debris.
- Insert the new cartridge by pushing it upwards and ensure that it clicks into place.
- Replace the filter housing by threading it clockwise onto the manifold until it is hand-tight.
- Turn on the water supply by turning on the cold-water valve under the sink.
That’s it! You’ve successfully replaced the old filter cartridge with a new one. Remember to run a few gallons of water through the filtration system to flush out any remaining air pockets and get a fresh drink of water.
Maintenance and replacement of filter cartridges are critical to the performance of your watts premier counter-top drinking water filter. Investing in a filtration system guarantees your family’s drinking water safety and quality.
Troubleshooting
Installing a watts premier counter-top drinking water filter is a perfect way to get clean drinking water without much hassle. However, like most things, it’s not immune to issues. In this section, we will look at some common problems users face and how to troubleshoot them.
Common Issues And How To Resolve Them
Low Water Pressure
- Check if the faucet aerator is blocked and clean it if needed
- Replace the filter cartridge if it’s too old or clogged.
Leaking Water
- Check the gasket around the housing’s o-ring and make sure it’s properly seated.
- Tighten or replace the housing’s o-ring if it’s damaged or broken.
- Check the tubing connections and tighten or replace if needed.
Foul Odor
- Run the filter for a few minutes after installation to clear any carbon fines or impurities.
- Change the filter cartridge if you notice a persistent odor.
No Water Flow
- Check if the filter cartridge is properly installed
- Ensure the faucet button is not blocked or stuck.
- Inspect the tubing for any kinks, blockages, or leaks
Tips For Maintaining The Filter System
Maintaining your watts premier counter-top drinking water filter is crucial to ensure it operates optimally. Below are some tips on how to do so.
Regular Filter Replacements
- Replace your filter cartridges every six months or after filtering 500 gallons of water to keep your water clean and free of contaminants.
Proper Storage
- Ensure your filter system is stored in a dry and well-ventilated area.
- Keep the parts dry to prevent mold and bacteria growth
Regular Cleaning
- Use a mild detergent to clean the system’s parts regularly
- Ensure the tubing connections are tightly secured
Troubleshooting your counter-top water filter system is not rocket science. The above tips will not only help you resolve common issues but also provide maintenance tips to ensure your filter system lasts longer and operates optimally.
Frequently Asked Questions On How To Installwatts Premier Counter-Top Drinking Water Filter
How Do I Install A Watts Premier Counter-Top Drinking Water Filter?
Installing a watts premier counter-top drinking water filter is easy. First, turn off your water supply, unscrew the aerator from the faucet and screw in the diverter valve. Then connect the filter to the valve, turn on the water supply, flush 5 gallons of water through it, and you’re done.
What Maintenance Are Required For The Watts Premier Counter-Top Drinking Water Filter?
To maintain your watts premier counter-top drinking water filter, you need to change the filter cartridge every 6-12 months or when the water flow slows down. Before changing cartridge, turn off the water supply, unscrew the housing, remove the old filter and replace with a new one.
Reassemble and you’re done.
Can The Watts Premier Counter-Top Drinking Water Filter Remove Lead And Other Contaminants?
Yes, the watts premier counter-top drinking water filter can remove lead, chlorine, sediment, cysts, and other contaminants. It uses a 2-stage filtration system including a carbon block filter and a sediment filter. These filters effectively remove most contaminants commonly found in tap water.
What Is The Lifespan Of The Watts Premier Counter-Top Drinking Water Filter?
The watts premier counter-top drinking water filter lifespan depends on the quality of the water source and the amount of water the filter process. On average, the filter should last for 6-12 months or 500 gallons of water. Changing the filter regularly ensures the best water quality and performance.
Is The Watts Premier Counter-Top Drinking Water Filter Compatible With All Faucets?
The watts premier counter-top drinking water filter works with most standard faucets. It comes with a universal diverter valve which can be easily connected to most faucets. However, if your faucet has a pull-out spray head or is a non-standard design, you may need an additional adapter.
Conclusion
After going through the process of installing the watts premier counter-top drinking water filter, you can now enjoy the convenience of having clean and safe drinking water right at your fingertips. With its user-friendly design and easy maintenance, this water filtration system is undoubtedly a great addition to any household.
By removing impurities such as chlorine, sediments, and other harmful elements, this filter enhances the taste and quality of your drinking water. Moreover, it provides a more cost-effective and environmentally friendly solution compared to buying bottled water. Regular maintenance is crucial for the system to perform optimally, so be sure to replace the filter cartridges as recommended by the manufacturer.
We hope that our guide has been helpful and informative in helping you successfully install your watts premier counter-top drinking water filter.